Related Posts Plugin for WordPress, Blogger...
Showing posts with label Computer ဆိုင္ရာ. Show all posts

Saturday, November 1, 2014

ကြန္ပ်ဴတာလံုျခံဳေရးနည္းလမ္းေလးတစ္ခုပါ

ကြန္ပ်ဴတာလံုျခံဳေရးနည္းလမ္းေလးတစ္ခုပါ

ကြန္ပ်ဴတာ သံုးစဲြသူတုိင္း မိမိတုိ႔ရဲ႕ ကြန္ပ်ဴတာ လံုၿခံဳေရးကုိ နည္းမ်ဳိးစံုနဲ႔ လုပ္ေဆာင္ေနၾကပါတယ္။ ခက္ခဲတဲဲ့ Password ေပးၿပီး လုပ္ၾကသလုိ ေဆာ့၀ဲလ္မ်ားျဖင့္လဲ ကာကြယ္ၾကပါတယ္။ မည္သုိ႔ပင္ လုပ္ေနလဲ ခုိးသူကအၿမဲ သာၿမဲ သာေနသည္မွာ ယခုမွ မဟုတ္ပါ။ အခုိးခံရသူမ်ားအတြက္ ဟာကြက္တစ္ခုျဖစ္ေသာအခ်က္တစ္ခုကုိကာကြယ္ႏုိင္ရန္ ေဖာ္ျပလုိက္ပါ၏။
ကြန္ပ်ဴတာ ၀င္းဒုိးတက္ လာပါက မိမိတုိ႔ အမည္ေပးထားတဲ့ User Account ကုိ ျမင္ေတြ႕ရမွာပါ။။။။ အဲဒီ Account အျပင္ Hide လုပ္ထားတဲ့ Administrator Accountဆုိတာ ရွိပါတယ္။ ျမင္ေတြ႕ခ်င္ရင္
ေတာ့ Ctrl + Alt + Delete ကုိ ႏွစ္ခါေလာက္ ႏွိပ္လုိက္ရင္ Login Box က်လာမွာပါ။ Userေနရာမွာ Administrator ကို ႐ုိက္ၿပီး Enter ေခါက္လုိက္ရင္ ၀င္းဒုိးထဲ ၀င္ေရာက္ႏုိင္ပါတယ္။
ဒါက စက္တုိင္းမွာ ဟာကြက္ တစ္ခုအေနနဲ႔ ရွိေနဆဲပါ။ သိသူက ယခု နည္းလမ္းကုိ အသံုးျပဳၿပီး ဖြင့္သံုးေနမွာပါ။ Administrator Account ျဖစ္တဲ့အတြက္ Data အျပင္ အျခားapplication ေတြကုိလဲ စိတ္ႀကိဳက္ သံုးစဲြႏုိင္ပါတယ္။
ဒီအတြက္ Administrator Account ကုိ ပိတ္ထားဖုိ႔ လုိအပ္ပါသည္။ ဦးစြာ My computerကုိ လုပ္ Right Manage ကုိေရြးပါ။ Local User and Groups ကုိ ဖြင့္ပါ။ User တြင္Administrator ကုိ Double Click လုပ္။ Box က်လာရင္ Account is disabled ကုိ အမွန္ျခစ္ေပးပါ။ Apply ၊ Ok လုပ္
ပါ။ဒါဆုိရင္ Ctrl + Alt + Delete လုပ္ၿပီး ဖြင့္လုိ႔ မရႏုိင္ေတာ့ပါ။ အေခြမ်ားျဖင့္ ၀င္ေရာက္ေနသည့္နည္းလမ္း မ်ားကုိေတာ့မဆုိလုိပါ။ ယခုနည္းလမ္းသည္ ကြန္ပ်ဴတာကုိ ခုိးယူ သံုးစဲြသူမ်ားအတြက္အင္မတန္လြယ္ကူေန၏။ သုိ႔ေၾကာင့္ ပိတ္ထားမည္ ဆုိလွ်င္ အလြယ္တကူ သံုးစဲြႏုိင္မည္ မဟုတ္ပါ။


Sayar  Chan

Sunday, April 13, 2014

ကြန္ပ်ဴတာထိုးရပ္သြားေစႏိုင္တဲ့အေၾကာင္းရင္းမ်ား


(1) Overheating

ကြန္ပ်ဴတာထိုးရပ္သြားေစႏိုင္တဲ့အေၾကာင္းရင္းမ်ားအနက္အႏၲရာယ္အႀကီးဆံုး
ျပႆနာက အပူလြန္ကဲျခင္းပါပဲ။ Software ကိုသာမက Hardwareကိုပါ
ပ်က္စီးေစႏိုင္တဲ့အတြက္ကြန္ပ်ဴတာအတြင္းအပူလြန္ကဲျခင္းမျဖစ္ေအာင္အၿမဲသတိျပဳသင့္ပါတယ္။
ကြန္ပ်ဴတာအတြင္းမွာအလုပ္အမ်ားဆံုးလုပ္ေဆာင္ရၿပီး အပူအမ်ားဆံုးထြက္တာ CPU မ်ားျဖစ္ပါတယ္။
ဒါေၾကာင့္ CPU မ်ားမွာ အပူမလြန္ကဲေအာင္ အေအးခံအေတာင္မ်ားနဲ႔ ပန္ကာမ်ားတပ္ဆင္ထားေပးရပါတယ္။
တကယ္လို႔ CPU ပန္ကာမလည္ေတာ့ပဲရပ္သြားမယ္ဆိုရင္ CPUမွာ အပူလြန္ကဲလာၿပီး
Kernel error တက္လာပါလိမ့္မယ္။ ဒီလိုဆိုရင္ကြန္ပ်ဴတာအတြင္းရွိ ပန္ကန္မ်ားနဲ႔အေအးခံစနစ္ေကာင္းစြာအလုပ္လုပ္ျခင္းရွိမရွိကို

ခ်က္ျခင္းစစ္ေဆးသင့္ပါတယ္။

Chipsetမ်ားကို ပံုမွန္လုပ္ႏိုင္တဲ့ စြမ္းေဆာင္ရည္ထက္ ပိုခိုင္းၿပီး Overclockingလုပ္တဲ့အခါမွာလည္း အပူလြန္ကဲလာတတ္ပါတယ္။ ဒါေၾကာင့္ ကြန္ပ်ဴတာပံုးမွာျပည့္စံုလံုေလာက္တဲ့
အေအးခံစနစ္မရွိပဲ Overclocking မလုပ္သင့္ပါဘူး။Overclocking လုပ္လုိက္လို႔ မီးခိုးထြက္လာတဲ့အထိအပူလြန္ကဲတာကိုႀကံဳဖူးပါတယ္CPUေၾကာင့္ျဖစ္တဲ့ျပႆနာကို
BIOS setting မွာ CPU internal cache ကို Disableလုပ္ထားျခင္းျဖင့္လည္း
ေျဖရွင္းႏိုင္ပါတယ္။ ဒီလိုလုပ္ျခင္းဟာ ကြန္ပ်ဴတာကိုပိုေႏွးသြားေစႏိုင္ေပမယ့္
တည္ၿငိမ္မႈပိုရေစႏိုင္ပါတယ္။

(2) Hard disk drives
ကြန္ပ်ဴတာကို Crash ျဖစ္ေစတဲ့ေနာက္ထပ္အေၾကာင္းရင္းတစ္ခုကHard disk
ကိုအသံုးျပဳတာၾကာလာတဲ့အခါမွာ Hard disk ေပၚမွာ ဖိုင္ေတြေနရာခ်ထားတာ႐ႈပ္ေထြးလာၿပီး
မႏိုင္၀န္ပိကာ ကြန္ပ်ဴတာထိုးရပ္သြားေစတာပါပဲ။Hard disk fragmented ျဖစ္တယ္ေပါ့ဗ်ာ။
ဒီလိုဆိုရင္ေတာ့ ေျဖရွင္းဖို႔ရာ နည္းလမ္းမ်ားစြာ ရွိပါတယ္။အ႐ိုးရွင္းဆံုးနည္းလမ္းကေတာ
့Start>Programs>Accessories>System Tools>Disk Defragmenter
ကေနDisk Defragmenter ကိုဖြင့္ၿပီး ဖိုင္ေတြကိုအစီစဥ္တက်ျပန္စီျခင္းပါပဲ
Defragment လုပ္ေနစဥ္အတြင္းမွာ Hard disk ေပၚမွာ ဖိုင္ေတြထပ္ေရးျခင္းမလုပ္သင့္ပါဘူးဒါေၾကာင့္
က်ေနာ္တို႔အေနနဲ႔ ကြန္ပ်ဴတာကို ဘာမွမသံုးတဲ့အခ်ိန္မွာပဲDefragment လုပ္သင့္ပါတယ္။
ေနာက္ထပ္သတိထားသင့္တာ တစ္ခုက Antivirus program ကိုလည္း ပိတ္ထားေပးသင့္ပါတယ္။
Hard disk မွာ ထည့္ထားတာ အရမ္းျပည့္လာတဲ့အခါမွာလည္းအလုပ္လုပ္တာေႏွးလာၿပီး
system ကို crash ျဖစ္ေစႏိုင္တာပါပဲ။ဒါေၾကာင့္ မလိုအပ္ေတာ့တဲ့ဖိုင္ေတြကို အပါတ္စဥ္
ဒါမွမဟုတ္ လစဥ္ ရွင္းထုတ္ၿပီးHard disk မွာ ေနရာလြတ္ရွိေအာင္ဖန္တီးထားသင့္ပါတယ္။

Temporary files ေတြကိုပံုမွန္ရွင္းထားေပးရင္ကို ေနရာလြတ္ေတာ္ေတာ္
မ်ားမ်ားရႏိုင္မွာပါ။start>run>%temp% ဆိုရင္ Temporary folder
ထဲေရာက္သြားပါလိမ့္မယ္။ဖ်က္သင့္တယ္ထင္တာ ဖ်က္ပစ္ေပါ့ဗ်ာ။အမ်ားစုက…
software တစ္ခုတင္တဲ့အခ်ိန္၊ အသံုးျပဳတဲ့အခ်ိန္မွာ ဖန္တီးထားတဲ့ဖိုင္ေတြပါအေတာ္
မ်ားမ်ားဖ်က္လို႔ရပါတယ္။Recycle Bin ကိုလည္းရွင္းဖို႔မေမ့ပါနဲ႔ဦး။အမိႈက္ပံုးသြန္ရတာ
အလုပ္႐ႈပ္လြန္းလို႔ ကၽြန္ေတာ္ဆို…ဘယ္ေတာ့မွအမိႈက္ပံုးထဲကိုမပို႔ဘူး……Shift+delete
နဲ႔အၿပီးရွင္းထုတ္လိုက္တာပဲ။

ဒါေပမယ့္မဖ်က္ခင္ အေသအခ်ာစဥ္းစားဖို႔ေတာ့လိုတယ္ေလ၊ ေနာင္တမရေၾကးေပါ့ဗ်ာ
Hard disk နဲ႔ပါတ္သတ္တဲ့ ေနာက္တစ္ခုက Hard disk မွာ errors ေတြ၊
bad sectors ေတြရွိမရွိအနည္းဆံုး တစ္လတစ္ခါေလာက္ေတာ့ scan လုပ္ေပးသင့္ပါတယ္။

Start>All programs>Accessories>System tools>Scan Disk ကိုသြားၿပီး
လုပ္လို႔ရပါတယ္။တခါတရံမွာ အဲဒီ Start Menu ထဲမွာ Scan Disk မပါဘဲ ျဖစ္ေနတတ္ပါတယ္။
ဒီလိုျဖစ္ေနၿပီဆိုရင္ေတာ့ Start>Run မွာ chkdsk လို႔႐ိုက္ေပးလုိက္ပါ။MS-DOS ကေန Scan လုပ္ေပးပါလိမ့္မယ္။ဒီလိုမွမလုပ္ခ်င္ဘူးဆိုရင္လည္း ကိုယ္စစ္ခ်င္တဲ့ Hard disk ရဲ႕ Properties
ကိုေခၚၿပီး Tools tab ေအာက္မွာ Error-checking ဆိုတဲ့ ေခါင္းစဥ္ေအာက္က Check Now
နဲ႕စစ္လည္းျဖစ္ပါတယ္။

သတိျပဳနိဳင္ႀကပါေစ......

(3) memory
ကြန္ပ်ဴတာထိုးရပ္သြားေစႏိုင္တဲ့အေၾကာင္းရင္းမ်ား အနက္ေနာက္ျပသနာတစ္ခုက

memory ပါ သူ ့ ျပႆနာကလည္း Blue death screen တက္လာၿပီး
Fatal Exception Error ျဖစ္ေစႏိုင္တဲ့အေၾကာင္းရင္းတစ္ခုပါပဲ။ ဒီmemoryေၾကာင့္ျဖစ္တဲ့ ျပႆနာကလည္း အေတာ္မ်ားမ်ားၾကံဳေတြ႕ရေလ့ရွိပါတယ္။

fatal error ဆိုတာက Hardware နဲ႕ပါတ္သတ္ၿပီး ျပႆနာႀကီးႀကီးမားမားတစ္ခုရွိေနၿပီဆိုတာကိုညႊန္ျပျခင္းပါပဲ။

တစ္ခါတေလမွာ….လံုး၀သံုးမရေတာ့ဘဲ အသစ္တစ္ခုအစားထိုးရေတာ့မယ္ဆိုတဲ့ အဓိပၸာယ္ပါ။

ဒါေပမယ့္ memory ေၾကာင့္ျဖစ္တဲ့ Fatal error ဆိုရင္ေတာ့ chips အခ်င္းခ်င္း တြဲဖက္မညီတဲ့အခါမ်ိဳးမွာလည္းျဖစ္တတ္ပါတယ္။ဥပမာ - 70ns Ram နဲ႕ 60ns Ram ႏွစ္ေခ်ာင္းကိုတြဲစိုက္ထားမယ္ဆိုရင္ပိုေႏွးတဲ့ 60ns နဲ႕ပဲ ကြန္ပ်ဴတာက အလုပ္လုပ္မွာပါပဲ။အဲဒါကိုမွmemory
ကို overworked ျဖစ္ေစတဲ့ Program မ်ိဳးကိုဖြင့္လိုက္တဲ့အခါမွာ၊Memory မ်ားမ်ားသံုးတဲ့ software ေတြကိုသံုးလိုက္တဲ့အခါမ်ိဳးမွာကြန္ပ်ဴတာက….Crash ျဖစ္သြားေတာ့တာပါပဲ။သူမွာက 70ns Ram လည္းရွိေနေတာ့ အဲဒီအျမန္ႏႈန္းနဲ႔သံုးဖို႔ၾကိဳးစားပါေလေရာ။ဒါေပမယ့္ 60ns Ram ကမလိုက္ႏိုင္တဲ့အခါ…ထိုးရပ္သြားေတာ့တာေပါ့။

ကဲ……ဒီျပႆနာကို
ေျဖရွင္းၾကည့္ရေအာင္။ပထမနည္းလမ္းကေတာ့ BIOS setting မွာ Ram ရဲ႕ Wait state ကိုတိုးေပးထားလို႔ရပါတယ္။ဒီလိုလုပ္ျခင္းအားျဖင့္ memory
ကိုပိုတည္ၿငိမ္ေစပါတယ္။ေနာက္ထပ္နည္းလမ္းတစ္ခုကေတာ့……..Motherboard ေပၚက memory ေတြကို ေနရာေျပာင္းၾကည့္ျခင္းပါပဲ။

memoryကိုျဖဳတ္တဲ့ေနရာမွာ တစ္ခုသတိထားရမွာက၊ ေၾကးျပားေျခေထာက္အေခ်ာင္းေလးေတြကို
မထိမိေစဖုိ႔ပါပဲ။လူမွာရွိတဲ့ Static charge ေၾကာင့္ memory ကိုပ်က္စီးေစႏိုင္လို႔ပါ။အေကာင္းဆံုးကေတာ့……
..မတူညီတဲ့ အျမန္ႏႈန္းနဲ႔ Ram ႏွစ္ခုၿပိဳင္တူထည့္မထားဖို႔ပါပဲ။

သတိျပဳနိဳင္ႀကပါေစ.....

(4) Software
ကြန္ပ်ဴတာထိုးရပ္သြားေစႏိုင္တဲ့အေၾကာင္းရင္းမ်ားအနက္ျပသနာတစ္ခုက
ကြန္ပ်ဴတာမွာအသံုးျပဳမယ့္ ေဆာ့ဖ္၀ဲမ်ားကို စနစ္တက်တင္မထားခဲ့ရင္လည္း
ကြန္ပ်ဴတာအသံုးျပဳေနစဥ္ ထိုးရပ္သြားေစႏိုင္ပါတယ္။ ေဆာ့ဖ္၀ဲကို ျဖဳတ္ခ်ၿပီးမွ
စနစ္တက်ျပန္တင္ေပးျခင္း ျဖင့္ ဒီျပႆနာကိုေျဖရွင္းႏိုင္ပါတယ္။ ရံဖန္ရံခါမွာေဆာ့ဖ္၀ဲကို
ျဖဳတ္ခ်လို႔မရဘူးျဖစ္ေနတတ္ပါတယ္။ ဒီလိုဆိုရင္ေတာ့ NortonUninstall ဒါမွမဟုတ္
Uninstall Shield ကိုအသံုးျပဳလိုက္ရင္ျဖဳတ္ခ်လို႔ရႏိုင္ပါတယ္။ ဒီေဆာ့ဖ္၀ဲမ်ားဟာ
သမားရိုးက်ျဖဳတ္ခ်တာ ထက္ SystemRegistry မွာ ျဖဳတ္ခ်လိုက္တဲ့
ေဆာ့ဖ္၀ဲနဲ႔ပါတ္သတ္တာမ်ားကိုပါ ရွင္းေပးတဲ့အတြက္ Clean Uninstall
လုပ္ေပးႏိုင္တဲ့ စြမ္းေဆာင္ရည္ရွိပါတယ္။Registry ကိုပါရွင္းေပးထားပါမွ
ေဆာ့ဖ္၀ဲကိုအသစ္တဖန္ျပန္တင္တဲ့အခါရွင္းရွင္းလင္းလင္းတင္ ေပးႏိုင္မွာပါ။
Registry မွာတန္ဖိုးအေဟာင္းမ်ားက်န္ခဲ့ရင္
အသစ္တင္လိုက္တဲ့အခါမွာထပ္ေရးတဲ့တန္ဖိုးမ်ားနဲ႔ ေရာေထြးၿပီး
ေဆာ့ဖ္၀ဲဟာပံုမွန္မဟုတ္ပဲျဖစ္ေနတတ္ပါတယ္။Registry ကိုရွင္းေပးတဲ့အျခား
ေဆာ့ဖ္၀ဲမ်ားလည္းရွိပါတယ္။
Registry Mechanics, System Mechanics, One click ,maintenance
, Registry cleaner စသည္ျဖင့္ အမ်ားႀကီးရွိပါတယ္။Registryကိုရွင္းမယ္ဆိုရင္ သတိထားဖို႔ေတာ့လိုပါတယ္။ တကယ္လို႔ Registry မွာလိုအပ္တာေတြ ပ်က္သြားရင္ OS တစ္ခုလံုးကိုျပန္တင္ရတဲ့အထိျဖစ္သြားႏိုင္ပါတယ္။

သတိျပဳနိဳင္ႀကပါေစ........


Sayar Chan

ကြန္ပ်ဴတာShutdown လုပ္သည့္အခ်ိန္ ၾကာျမင့္လြန္းလွ်င္


ကြန္ပ်ဴတာသမားေတာ္ေတာ္မ်ားမ်ားကေတာ့ Nvidia Driver Helper Service (Nvidia Video Card မွသံုးသည္) ဟာ Shutdown လုပ္တဲ့အခ်ိန္ကို ၾကာေစတယ္လို႔ ေျပာၾကပါတယ္။ ဒါေပမဲ့လည္း အဲဒီျပႆနာကို Nvidia Video Card Driver ကို Update လုပ္ျခင္းျဖင့္ ေျဖရွင္းႏိုင္ပါတယ္။ တစ္ခ်ိဳ႕သူေတြကေတာ့ Terminal Service ကို Disable လုပ္လိုက္ရင္ Shutdown လုပ္တဲ့အခ်ိန္ သိသိသာသာကို ျမန္သြားတယ္လို႔ ေျပာၾကျပန္ပါတယ္။ Terminal Services ဟာ Remote Assistance, Remote Desktop နဲ႔ Fast User Switching ေတြအလုပ္လုပ္ႏိုင္ဖို႔အတြက္ ေထာက္ပံ့ေပးပါတယ္။ သံုးမ်ိဳးစလံုးကို ျမန္မာႏုိင္ငံက ကြန္ပ်ဴတာသံုးစဲြသူေတြ မသံုးသေလာက္နီးပါးရိွတဲ့အတြက္ အဲဒီ Terminal Services ကို ပိတ္ထားလိုက္လို႔ရပါတယ္။ ပိတ္နည္းကေတာ့
၁။ Start>Run မွတစ္ဆင့္ services.msc ဟု႐ိုက္ၿပီး Enter ေခါက္ပါ။
၂။ Services Window ပြင့္လာပါလိမ့္မည္။ Services အမည္မ်ားကိုလည္း တန္းစီၿပီး ေတြ႕ရပါလိမ့္မည္။
၃။ ထိုအထဲတြင္ Terminal Services ကိုေတြ႕ေအာင္ရွာပါ။ ေတြ႕လွ်င္ Double Click ႏိွပ္ပါ။
၄။ Properties Dialog box တစ္ခုက်လာပါလိမ့္မည္။ Startup type drop down list box ကိုႏိွပ္ၿပီး Disabled ကိုေရြးပါ။ OK ႏိွပ္ပါ။
၅။ Computer ကို Restart လုပ္ပါ။ ေနာက္တစ္ခါ Shutdown လုပ္ၾကည့္ပါ။ ပိုျမန္လာပါလိမ့္မည္။

shutdown အခ်ိန္ကို ၾကာျမင့္ေစတဲ့ ေနာက္ထပ္အေၾကာင္းအရာတစ္ခုကေတာ့ Windows ဟာ shutdown လုပ္တဲ့အခါမွာ Virtual Memory နဲ႔ Hibernation Cache ကို ဖ်က္ဖို႔ ႀကိဳးစားျခင္းပဲ ျဖစ္ပါတယ္။ အဲဒီလို Virtual Memory နဲ႔ Hibernation Cache ကို ဖ်က္ျခင္းဟာ Shutdown လုပ္တဲ့အခ်ိန္ကို အရမ္းၾကာျမင့္ေစပါတယ္။ တကယ္တမ္းေတာ့ အဲဒီဖ်က္တဲ့ Function ကို Windows က ပိတ္ထားေလ့ရိွပါတယ္။ ဒါေပမဲ့ တခ်ိဳ႕ software ေတြက အဲဒါကို ျပန္ဖြင့္တတ္ပါတယ္။အဲဒီလို သြားဖ်က္တဲ့ Feature ေလး ကိုယ့္ပီစီမွာ ဖြင့္ထားသလား၊ ပိတ္ထားသလား ဆံုးျဖတ္ဖို႔အတြက္ Run ထဲမွာ gpedit.msc လို႔ ရိုက္ၿပီး Enter ေခါက္ပါ။ ပြင့္လာရင္ ဘယ္ဘယ္မွာရိွတဲ့ Computer Configuration>Windows Settings>Security Settings>Local Policies>Security Options ကို ေရာက္ေအာင္သြားပါ။ ၿပီးရင္ ညာဘက္မွာေပၚလာတဲ့ စာတန္းေတြထဲကေန Shutdown: Clear virtual memory page file ဆိုတဲ့ စာသားေလးကို ရွာပါ။ Disabled ျဖစ္ေနတယ္ဆိုရင္ ပိတ္ထားတာပါ။ Enabled ျဖစ္ေနတယ္ဆိုရင္ Disabled လုပ္ပစ္ရမွာပါ။ Disabled လုပ္ဖို႔အတြက္ အဲဒီစာသားေပၚမွာ Double Click ႏိွပ္ၿပီး Disabled ကိုေရြးပါ။ OK ေပၚ ႏိွပ္ပါ။ ကြန္ပ်ဴတာကို Restart လုပ္ပါ။

အဆင္ေျပၾကမယ္လို႔ထင္ပါတယ္.....

Sayar Chan

Monday, March 3, 2014

ေမးလ္( ပို႔တဲ႔ ) နာမည္ေၿပာင္းၾကမယ္


မိတ္ေဆြ ဟာ ကုမၸဏီ တစ္ခုမွာ အလုပ္၀င္ေနခဲ႔လို႔ရွိရင္ အလုပ္နဲ႔ သက္ဆိုင္ေသာ စာေတြကို ေမးလ္နဲ႔ ေပးပို႔မူဟာ ၾကိမ္းေသ ၾကံဳရမွာ ၿဖစ္ပါတယ္။ တစ္ခ်ိဳ႕ကုမၸဏီေတြက ကိုယ္ Staff ရဲ႕ ကိုယ္ပို္င္နာမည္နဲ႔ ေမးလ္ကိုခြင္႔ၿပဳတာရွိသလို တစ္ခ်ိဳ႕ေတြက်ေတာ႔လည္း ကုမၸဏီနာမည္နဲ႔သာ သံုးဖို႔ ဆိုထားၾကပါတယ္။ ပို႔တာကဘယ္နာမည္နဲ႔ပဲ ၿဖစ္ၿဖစ္ပို႔လို႔ အဆင္ေၿပပါတယ္။ သို႔ေပမဲ႔ တကယ္တမ္း အလုပ္ခြင္မွာ အမည္ေတြကို ဘယ္သူဘယ္သူ ပို႔တယ္ဆိုတာ မွတ္ထားဖို႔က နည္းနည္းေတာ႔ခက္ပါလိမ္႔ မယ္။

ဥပမာ - က်ေတာ႔ဆို news@smart.com.mm ကိုအလုပ္ေမးလ္အၿဖစ္ သံုးပါတယ္။အဲဒီလိုသံုးတဲ႔အခါ က်ေတာ္ နာမည္ကို By name နဲ႔ ေပးထားပါတယ္။ အဲလိုဆိုေတာ႔ က်ေတာ႔ေမးလ္ပို႔လိုက္တိုင္း က်ေတာ္နာမည္ကို တစ္ဖက္မွ ေမးလ္လက္ခံတဲ႔လူေတြကသိနိင္ၿပီး အလြယ္တကူ ဆက္သြယ္နိင္ပါတယ္။ ၿပီးေတာ႔ က်ေတာ္တို႔အ၇င္ က အေပ်ာ္သေဘာနဲ႔ ေပးထားတဲ႔ ေမးလ္ နာမည္ေတြကလည္း နည္းနည္း ရီဖို႔ေကာင္းၿပီး ရုတ္တရက္ အၿခားလူေတြ သိဖို႔ခက္တယ္မလား ။ အဲလို အေၿခအေနေတြမွာ ကိုယ္သိေစခ်င္တဲ႔ နာမည္ကို ေၿပာင္းထည္႔ထားၿခင္း ၿဖင္႔ အဆင္ေၿပကာ အၿခားသူေတြ အလြယ္တကူသိနိင္မွာပါ။ ႏို႔မို႔ရင္အရင္ေပးထားတဲ႔ ေမးလ္နာမည္ေတြအတိုင္းသာ ေပၚေနမွာ ၿဖစ္ပါတယ္။ အမ်ားအဆင္ေၿပေအာင္ G mail , Yahoo, နဲ႔ Outlook ေတြမွာပါ ေမးလ္နာမည္ေၿပာင္းလို႔ရေအာင္ ေဖာ္ၿပေပးလိုက္ပါ တယ္ေနာ္ ။

G mailညာဖက္အေပၚေထာင္႔ဆံုးနားမွာ ရိွတဲ႔ Gear ( စၾကာ) ပံုေလးကိုုႏွိပ္ၿပီး Setting ကိုေရြး >> ၿပီးလွ်င္ေပၚလာတဲ႔ Accounts ကိုႏွိပ္ပါမယ္။ ၿပီးလွ်င္ Send mail as ဆိုတဲ႔အပိုင္းရဲ႕ ေဘးမွာရွိတဲ႔ "edit info" ကိုႏွိပ္ပါမယ္။ ေနာက္ၿပီး ေပၚလာတဲ႔ box ေလးထဲမွာ ကိုယ္ေမးလ္ပို႔တဲ႔ အခါေပၚေစခ်င္တဲ႔ နာမည္ကိုရိုက္ႏွိပ္ၿပီး Save Changes ကို ႏွိပ္ၿပီး ရင္ေတာ႔ အဆင္ေၿပပါၿပီ။

Yahoo Mail Gear

Gear >> Setting >> Account >> Yahoo account section >> Edit ကိုႏွိပ္ပါမယ္။ ေပၚလာတဲ႔ Sending name box မွာ နာမည္အသစ္ထည္႔ပါမယ္။ ၿပီးရင္ေတာ႔ Save နိွပ္လိုက္ပါ.။ ဒါဆိုရင္ေတာ႔ အဆင္ေၿပပါၿပီ။

Outlook.com

Gear >> More mail settings >> Managing your account ေအာက္မွာရွိတဲ႔ Account details ကိုႏွိပ္ပါ။ ေပၚလာတဲ႔ "Edit display name" မွာ လိုအပ္တဲ႔ နာမည္ေရွ႕စာလံုးနဲ႔ ေနာက္စာလံုးကို ထည္႔ပါ။ ၿပီးရင္ေတာ႔ Save လိုက္ေပါ့ ။ ဒါဆိုရင္ေတာ႔ ရပါၿပီ။ ယခုလို အဆင္႔ဆင္႔ ၿပဳလုပ္ၿပီး ရင္ေတာ႔ မိတ္ေဆြတို႔ပို႔လိုက္တဲ႔ ေမးလ္တိုင္းမွာ မိတ္ေဆြတို႔ရဲ႕ ကိုယ္ပုိင္နာမည္ေတြနဲ႔ စိတ္ၾကိဳက္ ၿမင္ေတြ႕ရမွာ ၿဖစ္ပါတယ္။

အဆင္ေၿပၾကပါေစဗ်ာ ။

Sunday, January 26, 2014

Wisc Auto Shutdown (မိမိစက္ကုိ အခ်ိန္နဲ႔ တစ္ေၿပးညီ Auto Shutdown ၿပဳလုပ္ခ်င္သူေတြအတြက္)


မဂၤလာပါဗ်ာ ကြန္ပ်ဴတာ တစ္ေန႔ကုန္ အသုံးၿပဳေနတဲ႔ သူငယ္ခ်င္းေတြအတြက္ အိပ္ငုိက္ရင္ Auto Shut dowတုုိ႔ Restartတုိ႔ Log off တုိ႔ Sleep တုိ႔ Power off တုိ႔ အခ်ိန္နဲ႔ တုိက္ၿပီး ခ်ိန္းထာားလုိ႔ ရပါတယ္။ မိမိခ်ိန္းထားေသာ အခ်ိန္ေပၚ မူတည္ၿပီး auto ပိတ္သြားမယ္ ၿဖစ္ပါတယ္။ ကဲ လုိအပ္တဲ႔ သူငယ္ခ်င္းမ်ား ေအာက္က လင္႔ႏွင္႔ ေဒါင္းႏုိင္ပါၿပီးခင္ဗ်ာ။ File Size လည္း 1MB ပဲ ရွိပါတယ္။
                                                        >>>zippyshare.com<<<

Tuesday, January 14, 2014

Monday, January 13, 2014

ကြန္ျပဴတာ Notepad မွ ျမန္မာစာ သိမ္းခ်င္တဲ့ သူေတြအတြက္ ျမန္မာစာေပၚေအာင္ ဒီနည္းေလး ကို ၾကည့္လိုက္ပါ


က်ေနာ္တို႕ ကြန္ျပဴတာသံုးတဲ့ သူတိုင္း ဟာ Website ေတြထဲက စာေတြ, ကဗ်ာ ေတြ ျပီးေတာ့ လင့္ေတြကို Notepad ထဲမွာ သိမ္းၾကပါတယ္။ အခု ျမန္မာစာကို Notepad ထဲမွာ သိမ္းရန္ Save ျပီးတိုင္း ပံုကလို ???? ပဲ ေပၚေနတဲ့ သူငယ္ခ်င္းေတြအတြက္ ေျဖရွင္းနည္းေလး ျဖစ္ပါတယ္။ လူေဟာင္းေတြကေတာ့ လူတိုင္း နည္းပါး ဒါကို နားလည္ၾကပါတယ္။ 
အခုမွ စသံုးတဲ့ သူေတြအတြက္ ရည္ရြယ္ျပီး ဒီနည္းေလးေရးတင္ေပးလိုက္တာပါ။ ေမးလာၾကတာလည္း မ်ားလာလို႕ အလြယ္ ၾကည့္နိုင္ေအာင္ ဒီနည္းေလးတင္ေပးလိုက္တာပါ။ ကြန္ျပဴတာ သံုးသူတိုင္း လူတိုင္း ျဖစ္မေန Notepad ကို အသံုးျပဳရတာပါ။ ေအာက္မွာ ပံုႏွင့္တကြ ေသခ်ာေလး ျပထားေပးပါတယ္။ အားလံုး နားလည္လိမ့္မယ္လို႕ ေမွ်ာ္လင့္ပါတယ္။
အရင္ဆံုး မိမိကြန္ျပဴတာရဲ႕ Dasktop ေနရာလြတ္တခုခုကို Right Click ေထာက္လိုက္ျပီး ေအာက္ကပံုကို ၾကည့္လိုက္ပါ။

 New ကိုကလစ္ျပီး Text Documant ကို ကလစ္လိုက္ရင္ Dasktop မွာ Text ဖိုင္တခု ျဖစ္လာပါတယ္။ အဲဖိုင္ကို ဖြင့္ျပီး ျမန္မာစာေရးရင္ ေအာက္က ပံုလို အတံုးေတြသာ ျမင္ရပါမယ္။

 ျမန္မာစာ ျမင္ရဖို႕က ေအာက္ကပံုကိုျပည့္လိုက္ျပီး ဆက္လုပ္လိုက္ပါ။ Format ကိုကလစ္ျပီး Font ကိုကလစ္လိုက္ပါ။
 ျပီးရင္ ေအာက္ကပံုလို ေဘာက္တခုက်လာပါမယ္။ အဲအခါဆိုရင္ Zawgyi-One ကိုေျပာင္းျပီး OK ေပးလိုက္ပါ။

 ဒါဆိုရင္ေတာ့ ျမန္မာလိုျမင္ရပါျပီ။ Save ဖို႕က ေအာက္ကပံုကို ဆက္ၾကည့္လိုက္ပါ။ အရင္ဆံုး File ကို ႏွိပ္ျပီး Save As ကို ကလစ္လိုက္ပါ။

Save As ကို ကလစ္ျပီးတာနဲ႕ ေအာက္ကပံုလို ေဘာက္တခုက်လာပါမယ္။ ဒီေနရာမွာ အေရးၾကီးပါတယ္။ Encoding ေနရာမွာ ANSI နဲ႕ ျပေနပါတယ္။ အဲတာကို ဒီအတိုင္း Save လိုက္ရင္ေတာ့ ???????? ပံုေတြပဲ ေပၚပါမယ္။ ေအာက္မွာ ျမားျပထားသလို Unicode ေျပာင္းျပီးမွ Save ပါ။
 ျပီးရင္ Do You Want To Replay It ဆိုတဲ့ စာတန္းနဲ႕ ေဘာက္တခုက်လာရင္ Yes သာေပးလိုက္ပါ။ ဒီအဆင့္ျပီးရင္ေတာ့ အားလံုး အဆင္ေျပပါျပီ။

ဒီေလာက္ဆိုရင္ ေမးထားၾကတဲ့ သူငယ္ခ်င္းေတြ နားလည္ေလာက္ျပီထင္ပါတယ္။ 
အားလံုးအဆင္ေျပပါေစ...။ 

Saturday, January 11, 2014

2014 သံုးဘာသာျပကၡဒိန္ Version 1.0 (For PC)

မိမိတို႔ရဲ့ ကြန္ျပဴတာမွာ ျပကၡဒိန္ ေလးထားခ်င္သူေတြအတြက္ ျပကၡဒိန္ေလးတစ္ခုတင္ေပးလိုက္ပါတယ္ ခင္ဗ်ာ ကြ်န္ေတာ္ လည္းတင္ထားပါတယ္ မိတ္ေဆြတို႕လဲ တင္လိုက္ပါအံုး. သူ႕မွာ ပါတဲ့ ဘာသာစကားေတြကေတာ့ တရုတ္၊အဂၤလိပ္၊ျမန္မာ သံုးဘာသာပါပါတယ္ ..ျပသဒါး၊ရက္ ရာစာ ေတြလည္း ပါပါတယ္ ကဲ ေဒါငး္လိုက္ပါ အံုး.

Wednesday, January 8, 2014

Your Uninstaller! Pro v7.5.2013.02 + Key


https://blogger.googleusercontent.com/img/b/R29vZ2xl/AVvXsEjjTWsRDuSAuRaWIQE9PR4oiCLI3IDWl1iH2MbUEbJ0L6gJHYiiB9JwGZHgT0dLWxIuoJz0fxNltzA1yv8nhBjHHoZOW9wYY1WgHszi5ANhevkZpdk_0qHQvcN9XsoaFTqSdu6luTRVSQ-I/s1600/your.uninstaller.pro.png

ညီမတစ္ေယာက္က Uninstaller ေကာင္းေကာင္းတစ္ခုေတာင္းေနတာနဲ႕ အျခားလိုအပ္ေသာသူငယ္ခ်င္း မ်ားပါ အသံုးျပဳႏုိင္ေအာင္တင္ေပးလိုက္ပါတယ္ဗ်ာ။ အခ်ိဳ႕သူေတြကေတာ့ ေျပာၾကပါလိမ့္မယ္ Control Panel ထဲကေန၀င္ဖ်က္လည္းရတာဘဲလို႕ေျပာလိမ့္မယ္။ ဟုတ္ေတာ့ဟုတ္ပါတယ္။ Control Panel ကေန Uninstall လုပ္တဲံ Software ေတြဟာ အကုန္လံုးကို မဖ်က္ႏိုင္ပါဘူး။ ဥပမာ Registry ထဲမွာက်န္ခဲ့တာမ်ိဳးေတြေပါ့။ အခု ကၽြန္ေတာ္တင္ေပးလိုက္တဲ့ Your Uninstaller ကေတာ့ Software ေတြကို အစအနမက်န္ေအာင္ Uninsall လုပ္ေနရင္အကုန္လံုး ကိုအစအနပါမက်န္ ဖယ္ရွာေပးႏိုင္ပါတယ္။ အဲဒီေတာ့ ကြန္ျပဴတာက Error ကင္းႏိုင္ တာေပါ့ဗ်ာ။ အေသးစိတ္ကိုေတာ့ေအာက္မွာအေသးစိတ္ရွင္းျပေပးထားပါတယ္ဗ်ာ။  Window XP , Vista နဲ႕ Window 7 ေတြမွာအသံုးျပဳႏိုင္ပါတယ္။ Full Version အျဖစ္ Serial Key ကိုပါထည့္သြင္းေပးလိုက္ပါတယ္ဗ်ာ။
 
Your Uninstaller! uninstaller software is the industry’s leading uninstaller software. It’s the world’s 1st smart Drag&Uninstall uninstaller software under the Windows platform, works on Windows 7/ Vista/ XP/. It’s as easy as using the recycle bin. Imagine! Just a drag-drop and the program you don’t want will disappear from your computer – as well as everything the unwanted program brings! Your Uninstaller! is a user-friendly way of removing unneeded applications on your computer. It can even remove some annoying spywares!

Your Uninstaller! software is a specially designed uninstaller program for both beginning and advanced users. Your Uninstaller! is extremely very fast and easy to use. It has a unique ability to uninstall items by simply dragging programs’ icons into the Your Uninstaller! icon. You may also find the application you want to uninstall through a unique search function.
Your Uninstaller! completely removes applications so quickly. Your Uninstaller! starts up 500 times faster than other Add/Remove programs. As you know, there are many installers in the world, such as InstallShield, Wise Installer, Microsoft Installer and many others. Most applications are built using these installers. Each installer has a unique install database, which makes it difficult to find all the changes programs’ make to your computer. That’s why other uninstallers can only uninstall part of an application-leaving some files and registry keys.
To solve this problem, Your Uninstaller! uses it’s unique technique: SmartUninstall has a database containing information about all installers on the market; so when it uninstalls a program, it automatically detects which installer the application used, then it simply uninstalls the application properly. That’s the reason Your Uninstaller! can detect and completely remove all the programs and icons on your computer.
Key features:
Completely remove any application installed.
Deep scan of registry and entire disk for unused registry entries and files.
Remove programs that could not be removed by Add/Remove Program.
Uninstall screen savers. [PRO]
Remove internet surfing traces.
Backup and restore registry.
Registration key management.
Built-in Disk Cleaner helps you find and remove unnecessary files on your disk to save space and make computer faster! [PRO]
Built-in IE Context Menu Cleaner, cleans the context menu of Internet Explorer. [PRO]
Built-in Startup Manager, take full control of Window startups. [PRO]
Fix invalid desktop shortcuts and start menu shortcuts.
Get the applications detail info even if it hide itself in deep directory, especially useful for finding out “Spy” applications. [PRO]
Backup/restore installed-applications information.
Uninstall with SINGLE drag-drop! Just drop a file on Your Uninstaller! icon on the desktop to see what happens! [PRO]
List installed applications with appropriate icons(same as you see in the Start Menu), you can easily find the application you want to uninstall.
Powerful search feature allows you quickly find the program you are about to uninstall.
Automatic detection of invalid installations and removing them with one click.
Force removal of uninstall related entries in the registry(care to use!). [PRO]
Lighting speed at startup, 5-10 times faster than Add/Remove Program of Windows XP!
Export programs list to file or printer.

 **  Step-1.ေအာက္က Download Button ကိုႏွိပ္လိုက္ပါ  
**  Step-2. "5sec". ေလာက္ေစာင္႕ေပးပါ။

**  Step-3. "  << SKIP AD >>   ".ကိုႏွိပ္ေပးပါ။
**  Step-4. Download Link က်လာပါလိမ္႕မယ္။
**  အဆင္ေျပပါေစဗ်ာ။
credit www.zwmnna.com


Download

Wondershare MobileGo for Android 4.2.0 For Win 8/7/XP/2003/Vista (ဖုန္းႏွင့္ ကြန္ျပဳတာ ကို ခ်ိတ္ဆက္နိုင္တဲ့ Suite ေလးျဖစ္ပါတယ္)


Wondershare MobileGo အသံုးျပဳတဲ့ သူငယ္ခ်င္းအတြက္ Update ေလးပါ Android ဖုန္း ၊ Tablet ေတြကုိေဆာ့၀ဲသြင္းျခင္း ၊ သီခ်င္းသြင္းျခင္း ၊ ဓာတ္ပုံထည့္ျခင္း ၊ Ringtone ထည့္ျခင္း ၊ Android ဖုန္းထဲက ေဆာ့၀ဲေတြ ၊ ဖုန္း Contact ေတြကုိ backup ျပန္လည္ရယူျခင္း စတဲ့ features ေတြကုိ မိမိရဲ႕ကြန္ပ်ဴတာကေနအလြယ္တကူျပဳလုပ္နုိင္မယ့္ ေဆာ့၀ဲေလးျဖစ္ပါတယ္။
 ဖုန္းနဲ႕ USB ၾကိဳး ခ်ိတ္ဆက္ျပီး အသံုးျပဳနိုင္ပါတယ္။ ေနာက္တနည္းကေတာ့ ဖုန္းထဲကို Wondershare MobileGo.apk ေလး Install ျပီး ၾကိဳးမဲ့ ျဖစ္ Wifi ခ်ိတ္ျပီး ဖုန္းရဲ႕ PC Suite အျဖစ္ အသံုးျပဳနိုင္ပါတယ္။ ဖုန္းအတြက္ေဆာ့၀ဲကိုေတာ့ ဒီလင့္မွာ ေဒါင္းနိုင္ပါျပီ။
ကြန္ျပဴတာအတြက္ Wondershare MobileGo ကေတာ့ ဒီေအာက္မွာေဒါင္းလိုက္ပါ။
ျပီးရင္ Licenses (Full Version) ျဖစ္ေအာင္ ေအာက္မွာေပးထားတဲ့ Patch ဖိုင္ကို ေဒါင္းပါ။ ျပီးရင္ Antivirus ကို ခနပိတ္ထားလိုက္ပါ။ 
Wondershare MobileGo ကို ကြန္ျပဴတာမွာ Install လုပ္ပါ။ ျပီးရင္ ေဆာ့၀ဲလ္ကိုမဖြင့္ပဲ Patch ဖိုင္ထဲက Patch.exe ကို ဖြင့္လိုက္ပါ။ ျပီးရင္ C:Program FilesWondershareMobileGo for Android အထိ သြားျပီးေတာ့ WUL.Core.dll ကိုကလစ္ျပီး Ok ႏွိပါေပးပါ။ ျပီးရင္ေတာ့ Full Version အသံုးျပဳနိုင္ပါျပီ။ Fb က သူငယ္ခ်င္းတေယာက္ ေတာင္းထားလို႕ တင္ေပးလိုက္တာပါ။
အားလံုးအဆင္ေျပပါေစ.......။

Monday, January 6, 2014

Win Rar 5.0 Beta 4 (32bit - 64bit) Full version


ဒါကေတာ့ chat box မွာ ေတာင္းဆိုထားတာေလးပါ .။
ကဲ win rar မရွိသူမ်ားကုိ ဖုိင္ေျဖစရာမလုိဘဲႏွင့္ တစ္ခါတည္း Download လုပ္ႏုိင္ေအာင္လုိ႔ exe ဖုိင္ႏွင့္ key ဖုိင္ကုိ တခါတည္း တြဲၿပီး တင္ေပးလုိက္ပါတယ္။ မဟုတ္ရင္ key ေကာ setup ကုိေရာ rar နဲ႔ ခ်ံဳ႕ၿပီး တင္လုိက္ျပန္ရင္ download လုပ္ၿပီး အဲ့ဖုိင္ကုိ ျပန္ျဖည္ဖုိ႔ win rar ရွိမွ ရပါလိမ့္မယ္။ အခု အဲ့လုိမ်ိဳး မျဖစ္ေအာင္  Download လုပ္ၿပီး တခါတည္း install လုပ္ႏုိင္ဖုိ႔အတြက္ တင္ေပး လုိက္တာ ပါ။ ေအာက္ မွာ activated version နဲ႔ ရုိးရုိး setup ဖုိင္ (၂) မ်ိဳး ခြဲၿပီး တင္ေပးထား ပါတယ္။

Download Winrar-v5.0 Activated version (key ထည့္စရာမလုိပါ။)
Zippyshare | Solidfiles | Filecloud | Ziddu | Sharebeast | Tusfiles | Mirrorcreator | Fileswap

============== (အေပၚက Link က key ထည့္ရန္မလုိပါ) =============

Download Winrar-v5.0 32bit  (key ထည့္ရန္လုိ)
Zippyshare | Solidfiles | Filecloud | Ziddu | Sharebeast | Tusfiles | Mirrorcreator | Fileswap

Download Winrar-v5.0 64bit  (key ထည့္ရန္လုိ)
Zippyshare | Solidfiles | Filecloud | Ziddu | Sharebeast | Tusfiles | Mirrorcreator | Fileswap

Download Winrar-v5.0 32 x 64bit Key (ထည့္ရန္ Key file )
Zippyshare | Solidfiles |  Ziddu | Sharebeast | Tusfiles | Mirrorcreator | Fileswap
(ကီးဖုိင္ထည့္တာေတာ့ လြယ္ပါတယ္ ရလာတဲ့ reg ဖုိင္ေလးကုိ Double click ႏွိပ္ေပးလုိက္ပါ။)

Friday, January 3, 2014

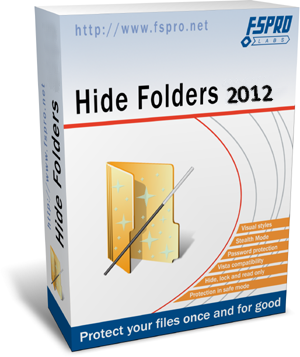
Hide Folders v4.3.7 Final + Crack


http://www.fullprogramlarindir.com/wp-content/uploads/2013/12/Hide-Folders-2012-4..png
ကြန္ျပဴတာထဲမွာ ရွိတဲ့ မိမိရဲ႕ Personal Data ေတြကို အျခားသူမ်ားမၾကည့္ႏိုင္ေအာင္လို႕ Hide Folders ေနာက္ ဆံုးထြက္ Version ေလးတင္ေပးလိုက္ပါတယ္ဗ်ာ။ သူ႕ရဲ႕လုပ္ေဆာင္ခ်င္ေလးကေတာ့ မိမိမျမင္ေစခ်င္တဲ့ Data ေတြကို Hide လုပ္ထားႏိုင္ပါတယ္။ Lock ခ်ထားႏိုင္ပါတယ္။ Read Only လုပ္ထားႏိုင္ပါတယ္။ Hide & Lock လုပ္ထားႏိုင္ပါတယ္။ သူ႕ကလည္း ကၽြန္ေတာ္စမ္းျပီးကလိၾကည့္ရသေလာက္ေတာ့ Save ျဖစ္ပါတယ္။ NTSF , FAT , FAT32 အားလံုးမွာအသံုးျပဳႏိုင္ပါတယ။ Window OS အေနနဲ႕ကေတာ့ XP , Vista , 7 , 8 , 8.1 အားလံုးမွာအသံုးျပဳႏိုင္ပါတယ္။ အျမဲတမ္းသံုးႏိုင္ေအာင္ Crack Fie ကိုပါထည့္ေပးထားပါတယ္ဗ်ာ။ အေသး စိတ္သိခ်င္ရင္ေတာ့ေအာက္မွာေလ့လာႏိုင္ပါတယ္။


Hide Folders 2012 an easy tool for hiding your sensitive information from prying. The program allows you to hide entire folders on computers running Windows. Very convenient and easy to use, simply drag a folder in the concealed window and pressing a single button. Hide Folders 2012 program was designed to help you keep your secrets secret. Below are just some of the characteristics of programs that allow it to effectively and simply solve the problem of protecting your privacy.Features and capabilities of the program:
Effective protection methods allow you to hide files and folders from other users on Windows XP and Windows Vista, 7, 8.8.1
Hidden files and folders are available only to you and nobody else.
4 protection methods available: Hide, Lock, Hide & Lock, Read Only.
Supports all file systems: NTFS, FAT, FAT32
Supports file masks, which allow you to protect only certain types of files
Unlimited number of protected sites.
Trusted Processes, allow you to back up your files in a secure state.
The program does not modify the file system – all protection is provided in the file driver.
Password protection on startup Hide Folders 2012.
Password protection removal program Hide Folders 2012.
Removing Hide Folders 2012 manual does not lead to the disclosure of information
When you try to delete top-level folders, secure files and folders are not removed.
Multiple options to hide the traces of hidden files and the program itself.
Anti-blocking system folders.
stealth mode – driver protection is not visible in Task Manager Windows.
Data protection in security Windows.
Hot keys.
Manage the command line.
Integration with Windows
Protect folders, called on Russian and any other languages.
An intuitive and simple user interface Maskimalno supporting sobstennyh visual styles

 **  Step-1.ေအာက္က Download Button ကိုႏွိပ္လိုက္ပါ  
**  Step-2. "5sec". ေလာက္ေစာင္႕ေပးပါ။

**  Step-3. "  << SKIP AD >>   ".ကိုႏွိပ္ေပးပါ။
**  Step-4. Download Link က်လာပါလိမ္႕မယ္။
**  အဆင္ေျပပါေစဗ်ာ။


Download

Thursday, January 2, 2014

CD/DVD ေခြပ်က္ေတြထဲက DATA ေတြ ျပန္ယူနည္း


မဂၤလာပါ..ကၽြန္ေတာ္ Sayar Chan ပါ.. ။ ။ဒီတစ္ခါ ကၽြန္ေတာ္က
CD/DVDs ေခြပ်က္ေတြထဲက Data ေတြကို 90% ထိ အလြယ္တကူ ျပန္ယူႏိုင္မဲ့ Software ေလးပါ..

1. အရင္ဆံုး ဒီေနရာကေန Download & Install လုပ္ပါ.. >>> CD Recovery Toolbox

2. စက္ထဲကို ပ်က္ေနတဲ႔ CD/DVD ထည့္ေပးျပီး  NEXT ကို ႏွိပ္ပါ ။

3. သိမ္းထားမဲ့ ေနရာကို ေရြးေပးျပီး  NEXT ကို ထပ္ႏွိပ္ပါ ။

4. လိုခ်င္တဲ႔ ဖိုလ္ေတြကို ေရြးျပီး SAVE လုပ္ႏိုင္ပါျပီ ။

5. Save ျပီးေအာင္ ခဏေစာင့္လိုက္ပါ  ။

Sayar Chan

Friday, December 27, 2013

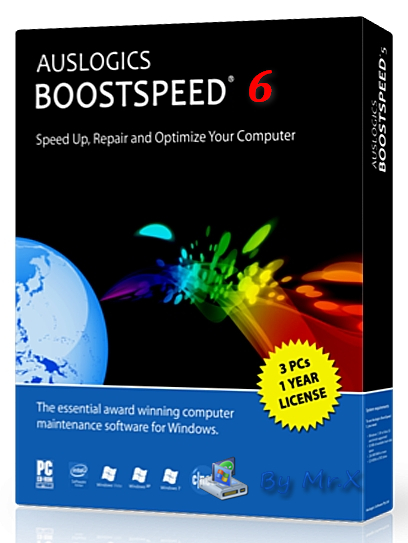
Internet Connection Speed & PC ရဲ႕ Speed ကိုျမွင့္တင္ေပးမယ့္ AusLogics BoostSpeed v6.4.1.0 + Key & Crack


http://www.bestbuildpc.org/uploads/image/Auslogics-Defrag.jpg

Auslogics BoostSpeed ဆိုတဲ႕ စြယ္စံုသံုး Maintenance Tool ကိုေတာ့ ေတာ္ေတာ္မ်ားမ်ားရင္းႏွီးၾကမယ္လို႕ ထင္ပါတယ္ဗ်ာ။ မိမိရဲ႕ ကြန္ျပဴတာအတြက္ အသံုးတည့္ေစမယ့္ Tools ေပါင္း 13မ်ိဳးအထက္ပါ၀င္ပါတယ္ဗ်ာ။ Disk Defrag , Internet Optimizer , Tweak Manager , Duplicate File Finder , File Shredder , Disk Wiper , Startup Manager , Uninstall Manager , Service Manager , Task Manager , System Information , Rescue Center , Browser Manager စတဲ႕ Tools ေတြပါ၀င္ပါတယ္။ ရင္းႏွီးျပီးသားကေတာ့ အေပၚမွာေျပာျပခဲ႕တဲ႕ Feature ေတြကိသိႏိုင္ပါတယ္။ မသိေသးသူမ်ားအတြက္လည္း Tools တစ္ခုခ်င္းရဲ႕ လုပ္ေဆာင္ခ်က္အေသး စိတ္ကိုရွင္းျပေပးထားပါတယ္ဗ်ာ။

AusLogics BoostSpeed - the ideal solution to keep your PC running faster, cleaner and error-free. This powerful optimization suite will boost Internet connections, tweak Windows to its peak performance, clean registry and block annoying ads. It's a great way to keep your computer clean and optimized.

Speed Up PC With BoostSpeed
Modify Windows settings, file system and services to greatly increase system performance. Increase startup and shutdown speed, disable annoying CD autorun and error reporting features. BoostSpeed will keep monitoring your system for possible optimizations and let you know if such optimizations are possible. You can also run the System Optimization Wizard to periodically optimize your PC.

Speed Up Internet
Adjust your PC for faster images, music and software downloads, increased browsing speed and reliable Internet connections. View your download speed and graphs. To gain additional performance boost you can also turn on DNS Optimization.

Block Banner Advertisements
Tired of annoying banner advertisements accompanying many web sites? Now you can eliminate advertisements and also speed up your Internet browsing with BoostSpeed Banner Killer! You can add your own web sites to the black list to block them from showing their advertisements.

Keep Disk and Registry Clean
Get rid of junk on the disks and registry of your PC. Remove hazardous and space-wasting files left by untidy programs and crashes of your system. Dramatically increase the performance of your PC by cleaning, optimizing and defragmenting local disks and registry.

Optimize Memory and Appearance
Badly written applications constantly steal memory without giving it back. That's why your PC becomes unstable with time and you have to reboot. BoostSpeed automatically frees up computer memory to gain additional performance boost. You can also manually recover memory and clipboard.

Keep your PC fast and safe
BoostSpeed will detect most of the popular "PC-slowers" - bundle-software (such as eDonkey or Kazaa) which silently download malware and spyware to your computer, taking up internet traffic and slowing down the system. This will also keep your system safe from prying eyes of spyware programs.

Boost Software Products
BoostSpeed can improve performance of different software products, including Microsoft Office, Internet browsers (such as Internet Explorer, Opera, Mozzila), E-mail clients (Outlook, The Bat), MSN Messenger, ICQ, Media Player and others.

System Optimization Tools
Greatly increase your PC startup speed with Autorun Manager, where you can disable or remove the programs which try to load up when Windows starts up. Force-uninstall unwanted software products which take up space on your computer and slow it down.

Networks Tools
Keep your connection alive while you're away, synchronize your computer clock with atomic clock over the Internet, lookup domain names and IP addresses, measure your Internet connection speed. Troubleshoot and improve your Internet connection and local network with an excellent selection of network management tools.

OS : Win 8 (32 or 64 bit), Win 7 (32 or 64 bit), Vista SP2 (32-bit only), XP SP3 (32-bit only)

Language : English

 **  Step-1.ေအာက္က Download Button ကိုႏွိပ္လိုက္ပါ  
**  Step-2. "5sec". ေလာက္ေစာင္႕ေပးပါ။

**  Step-3. "  << SKIP AD >>   ".ကိုႏွိပ္ေပးပါ။
**  Step-4. Download Link က်လာပါလိမ္႕မယ္။
**  အဆင္ေျပပါေစဗ်ာ။


credit   www.zwmnna.com

 
Penanggung Jawab Miftah Budi Kurniawan | Supported by Cheat Game 4U